How To Install More Than 1 OS On A Single Partition Using VirtualBox
You
may be a Windows user, a Linux user or you may be using some other
operating system. It may happen that you want to try out any other OS or
you may be a developer using some other OS.
In this case you have 2 primary options to install the second OS on your computer:
1. To install the second OS on a different partition and use a multi-partition system.
2. To install the second OS on the same partition.
The
first option of creating a separate partition may create some issues in
the long run. Either that the two OS may not be a well compatible one
or your hard drive may get corrupted more easily due to viruses or
other vulnerabilities.
And
that is why you might be interested to know more about the second
alternative i.e. to install the another OS on the same partition and
more specifically - on the same OS.
This is possible with - VirtualBox.
VirtualBox
is a freeware software that can emulate a virtual hard drive using some
space on your real hard drive on some OS. The virtual hard drive on the
VirtualBox system can then be used as a new computer itself and can be
used to install and use any other OS that you can install on any normal
hard drive.
To know more about VirtualBox and to download VirtualBox visit here: Virtualbox.org
For an example on how to use VirtualBox, we will have a look at creating a virtual hard drive and installing Windows XP on it.
How To Install Windows XP In VirtualBox
I
chose Windows XP for this tutorial because there are a lot of Linux
users and developers who use this OS for testing and other purposes. And
Windows XP is still the most preferred OS in the world.
So let us start with the steps:
1. Download and install VirtualBox
2. Run VirtualBox And Create New Virtual Machine
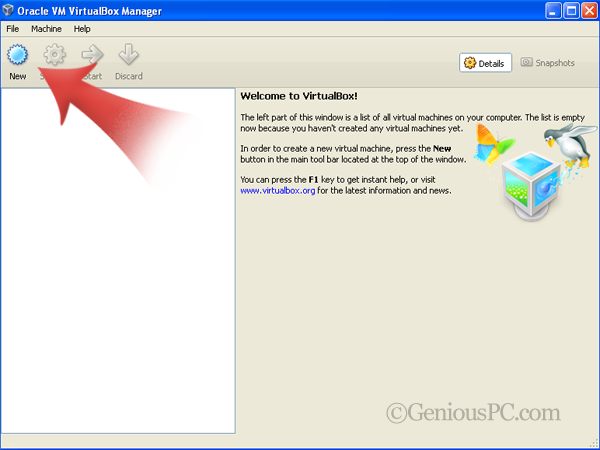
- Start VirtualBox and select on the 'New' button to start the "Create New Virtual Machine" Wizard.
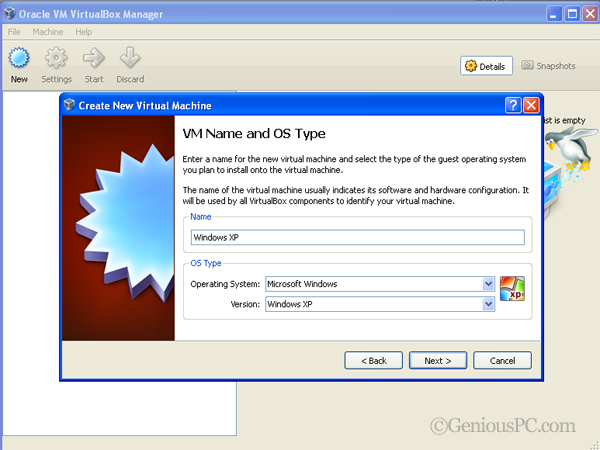
- Choose a name for your Virtual Machine (VM), select an OS and its version from the list.
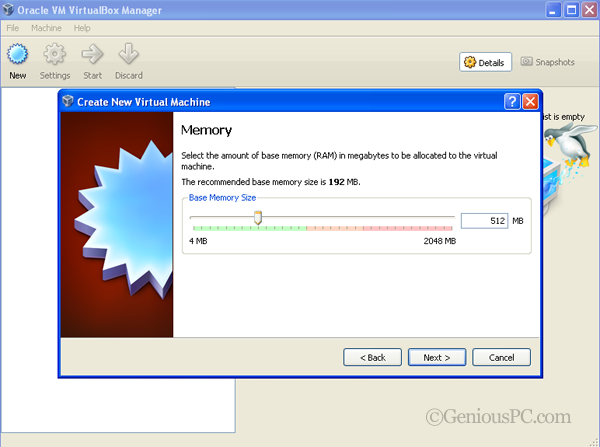
- At this stage, you have to select the amount of RAM you would like to dedicate to your virtual machine.
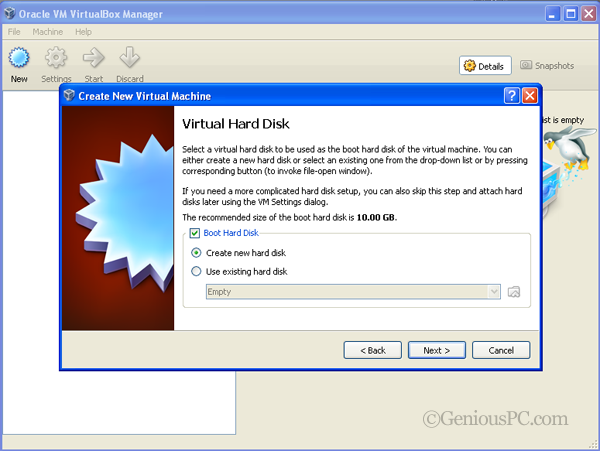
- If you have never created a virtual hard disk with VitualBox before (which I suppose here), then you would have only 1 option and that is to create a new one now.
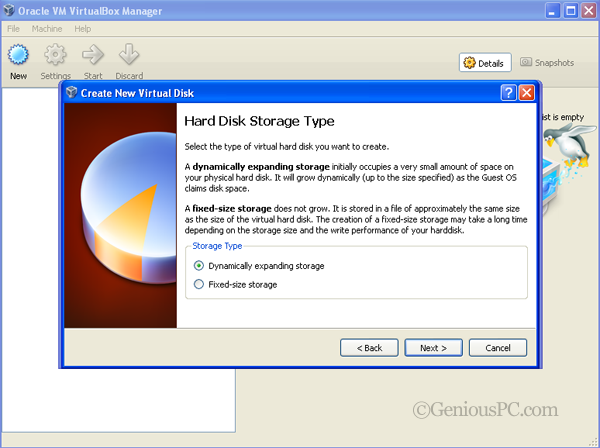
- Now there are 2 types of hard drives that you can create using VirtualBox. First is the dynamically expanding one which uses less space in the beginning and expands as needed. This one is ideal for those with smaller hard drive. The second one is of fixed-size which is better in case you have a larger hard drive and can wait a few extra minutes while the virtual drive is being created.
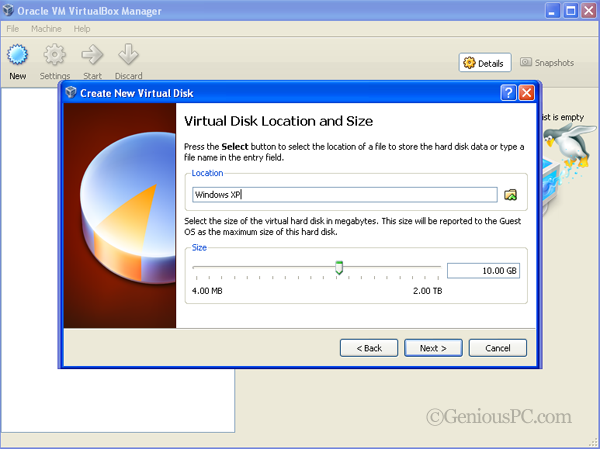
- After that, choose a name for your virtual disk and assign a size to it. For OS like Windows or Linux, about 6-10 GB would be sufficient to install and run the OS for minimum usage level. But if you are interested in installing the OS for heavier use and for storing a moderate or large number of files even in that second OS, you should assign at least 50 GB to your virtual hard disk.

- Check the final summary and click on 'Finish' to complete the process of creating the virtual machine.
3. Attaching The Required Removable Media To Install The OS
After
having created the virtual machine along with the virtual hard disk,
the next task is to attach the removable media which contains your OS
installation files like a DVD or CD.
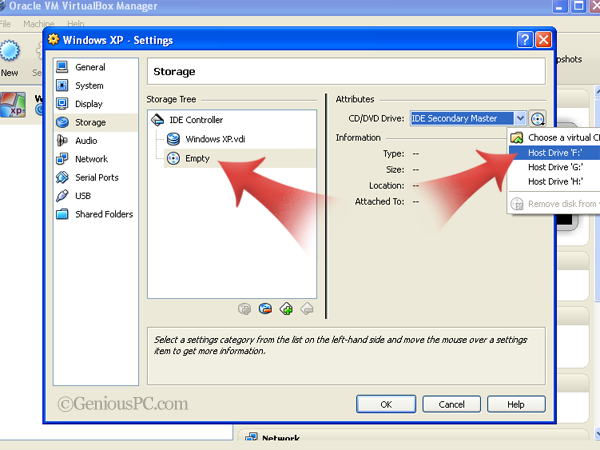
Select the newly created VM and click on "Settings" icon. Then go to storage settings.
As
shown in the figure, select the empty storage below the newly created
virtual drive and then assign the removable media you want to use with
it. You can select a CD/DVD or even a pendrive.
Now you are almost done with your VM.
4. Run The VM And Install Your OS
The last step is to run your virtual machine and install the OS from the removable storage you selected just a few while ago.
Select the VM from the main screen and click on the "Start" icon.
That's it!
Your
virtual machine will now start just like a brand new unused computer.
Follow the installation steps you perform with any normal hard drive and
install the OS on your virtual hard drive.
[Note: If you want to install Mac OS X on VirtualBox, refer this tutorial.]
After
the installation is over, you can start using the virtual OS as you
would use if you installed it on a separate partition! And that too
without any risks, vulnerabilities or any kind of issues that you would
face if you preferred a multi-partition system.
Tips And Summary On Using VirtualBox
- VirtualBox is a simple and free solution to install more than one OS on your computer. There are a lot of issues with multi-partition systems that you can easily avoid with the help of VirtualBox.
- To use more than 1 OS on your system, you need to install VirtualBox and create a virtual machine for your OS.
- Assign enough RAM and hard drive space to your virtual machine so that it runs smoothly but doesn't trouble the main system at the same time.
- Install your OS from the CD/DVD drive that you normally use and start using your 2nd OS! That too - within the same OS!
Facing any problems? Or any kind of errors? Be sure to drop a comment and let me help you!




0 comments:
Post a Comment