Displaying Labels also known as categorizes in your posts is always considered as an effective technique to provide your audience with a bit more context about your content, at their first glance. Recently, one of our users asked us that how to display labels in posts, in blogger? Considering the fact that, it gives your visitors a way to read your old content, It may not be recommended to those who are running a corporate blog on blogger. However, it is essential for all niches based sites running on blogger. In this article, we will show you, how to display Labels in your posts in blogger.
The first thing you need to do is to login into your Blogger account. After logging in select your blog in which you would like to display labels in posts. Now go to Template ›› Edit HTML ›› and search for the <data:post.body/> Tag and just above it paste the following XML coding. (Remember: You might see multiple tags, so be sure you are pasting the code at the right tag, it entirely depends on the template you are using).
<span class='post-label'> in <b:if cond='data:post.labels'>
<b:loop values='data:post.labels' var='label'>
<a expr:href='data:label.url + "?&max-results=10"' rel='tag'><data:label.name/></a><b:if cond='data:label.isLast != "true"'>,</b:if>
</b:loop>
</b:if> </span>
You can customize it with a bit of stylesheet, Here is a simple CSS that works pretty well. However, you can customize it according to your needs. There is not much to change, except the hyperlink and hover color. You should add the following code right above the ]]></b:skin> tag.
.post-label {
float:left;
font-size:14px;
color:#555
}
.post-label a {
color:#111
text-decoration:none;
}
.post-label a {
text-decoration:undeline;
}
Congratulations: Once everything is done save your template by pressing “Save Template” button. Congratulations, you have successfully added labels in your posts.
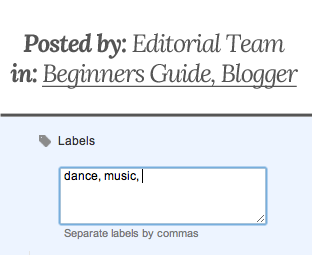
Note: While writing posts make sure you have assigned a label, otherwise you will not see any label when you publish the post. For more details, see the following screenshot:
We hope this tutorial may have helped you in learning how to add labels in your posts, in blogger. Does anybody is using the same practice to display labels in posts, we are using the same method at TRICKS. Do let us know what are your thoughts about it, let us have a meaningful conversation ahead.


0 comments:
Post a Comment